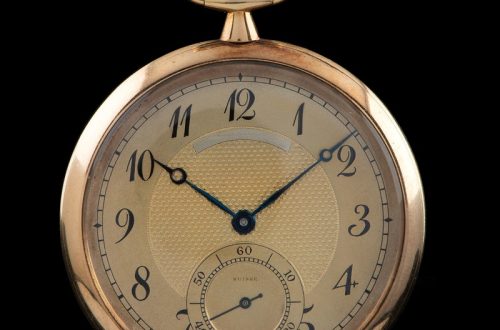
Unboxing the DIY Watch Kit
Initial Impressions and Contents
Upon opening the DIY mechanical watch kit, I was greeted with two neatly organized boxes. The smaller one held the watch components. They were housed in individual cardboard enclosures, which is thoughtful. This level of organization aids in keeping track of the numerous small parts that can easily get lost.
As I inspected each piece, I felt a mix of excitement and curiosity. The components promised the rewarding possibility of building my own mechanical watch. Peering into the box and examining the parts, I could see various gears and springs. Each piece awaited assembly and hinted at the complexity involved in watchmaking.
It was evident that the kit was designed to provide a comprehensive watchmaking experience. Each component represented a step in the journey from separate parts to a functioning timepiece.
Concerns Over Packaging Methods
However, not everything about the unboxing was reassuring. As an SEO expert and a professional blogger with an interest in watches, I was immediately taken aback by the use of a magnet to seal the larger box. Magnets close to mechanical movements can cause interference, potentially affecting the timekeeping accuracy of the watch.
This oversight suggests that while the kit is accessible to beginners, greater care is needed in ensuring the safety of sensitive components. While the packaging mistake may not deter all hobbyists, it’s an important consideration for those looking to avoid any potential damage to their soon-to-be-built timepiece.
In summary, while the kit provides all the necessities for a hands-on watchmaking experience, the packaging choices could be improved for the safety of the watch components.

Examining the Included Tools
Upon diving deeper into the DIY mechanical watch kit, I laid out the tools provided. The kit included several classic watchmaking implements crucial for the task ahead. These essential tools form the foundation for any watch enthusiast ready to embark on a personal watch assembly journey.
Essential Tools Provided and Missing Pieces
Expectations were met with the sight of familiar tools in the kit. Tweezers, a case opening knife, and a loupe were all present, ensuring a solid start. However, a key component was conspicuously absent — a screwdriver. Given my experience, the quality of a screwdriver can make or break a watchmaking adventure. Its absence presented an unforeseen hurdle, requiring improvisation or external acquisition to proceed. Another surprise was the inclusion of Rodico-like adhesive and finger cots, although some cots were already torn. The missing screwdriver hinted at future challenges that awaited me as I progressed with the assembly.
The revelation that a tool as fundamental as a screwdriver wasn’t included raised eyebrows. For any mechanical watch kit, the precision offered by a reliable screwdriver is non-negotiable. This oversight meant I would need to rely on personal tools to handle the watch’s delicate components. The absence could be a stumbling block for beginners without a well-equipped watchmaking toolkit at their disposal. The provision of the other tools, however, was a positive aspect, facilitating the primary steps of the DIY watchmaking process.
Assembly Instructions Overview
The cornerstone of any DIY project is a clear set of instructions, and assembling a mechanical watch kit is no exception. The success of the assembly largely depends on the quality and clarity of the guiding materials provided.
Accessing the Instructions
Conveniently, the mechanical watch kit comes with a guide that’s just a QR scan away. However, accessing these instructions comes with a catch – you must provide personal details, such as an email address. While the tutorials are easy to understand, the privacy trade-off might not sit well with everyone. Nevertheless, having a structured, step-by-step guide is crucial, especially for novices in watchmaking.
Personal Experience with DIY Watchmaking
During my journey with DIY watchmaking, I’ve learned that patience and precision are virtues. Whether you’re dealing with intricate gears or setting tiny hands, each step requires careful attention. Access to clear instructions, similar to those provided by the mechanical watch kit, has been invaluable. From customizing dials to troubleshooting movements, personal experience has shown me that there’s no substitute for hands-on learning. Assembling a DIY mechanical watch can be a fulfilling challenge that combines both technical skill and detailed craftsmanship.
Working on the Watch Case
Assembling a watch case is a pivotal moment in the DIY watchmaking process. Holding the stainless-steel frame, I felt the weight of responsibility to protect the delicate interior it would house. This step, however, was not without its hurdles.
Challenges with the Crystal
The first hurdle came in the form of the crystal. After unwrapping, the plastic crystal came loose, a not-so-pleasant surprise that added to my workload. Without a crystal press on hand, reattaching it was a tricky task. Persistence was key, but the crystal refused to fit snugly back into place. This raised concerns about the final water resistance and appearance of the watch.
Using a Replacement Crown and Stem
Following the crystal issue, I directed my attention towards installing the provided replacement crown and stem. With careful manipulation, I removed the original stem from the Miyota movement. It’s a relief when parts fit as intended, and thankfully, the stem paired perfectly with the case. Snapping the engraved crown into place felt satisfying – a small yet significant victory in the DIY journey.
As I worked on the case, I kept the mechanical watch kit components well organized. The quality of the crown and stem were noticeable, and with the right tools from the kit, their installation was straightforward. Their fitting was a testament to the attention to detail necessary in watchmaking, a lesson that any enthusiast should appreciate.

Setting the Dial and Hands
Installing the Dial
Assembling a DIY mechanical watch kit progresses with installing the dial. This step is vital. The dial acts as the watch’s face. It adds personality to the mechanical masterpiece. The sunburst dial included in the kit was visually appealing. It held the promise of creating a personalized and stylish timepiece. Installing it, however, proved tricky. The dial feet needed to align perfectly. Any misalignment could disrupt the entire assembly. A bit of wiggle hinted at some challenges, but it was manageable. Careful positioning ensured proper placement.
The Art of Handsetting
Next came the most nerve-wracking part: handsetting. This process demands patience and a steady hand. The mechanical watch kit’s hands were simple in design, aiding beginners. Their simplicity did not negate the precision required. At this juncture, the lack of a high-quality screwdriver was felt again. However, careful use of the tools on hand led to success. The hour, minute, and second hands were placed. They moved with satisfying uniformity. Completing the handsetting felt like a significant achievement. It’s where the individual parts finally started to look and act like a real watch.
Finishing Touches
Securing the Caseback
With the dial and hands in place, attention turns to securing the caseback. The process requires delicacy. Every turn of the wrist must be precise, ensuring a tight seal. As the movement nestles into its steel embrace, the anticipation builds. Each click as you screw the back on, signals nearing the end of the journey. However, faced with the odd sensation of ‘grit’ during the turn, patience is key. The feel of sand-like resistance suggests the need for a gentle touch. You want to avoid stripping the threads or damaging the delicate seal.
Attaching the Strap
The final step is fitting the strap to the watch. The kit comes with quick-release spring bars, a nice touch. They simplify attaching the strap to the case. Despite the quality concerns earlier, this feature brings a small convenience. Aligning the strap with the lugs, you push the spring bars into place. Hearing the ‘snap’ as they lock is rewarding. Fitting the buckle, I had to chuckle when I found it reversed. These quirks aside, seeing the finished product on the wrist is a moment of pride.
In wrapping up, the watch takes on its final form. It’s a unique blend of parts, guided by personal effort. Strapping it on, the DIY mechanical watch is no longer just a kit. It is a testament to the builder’s perseverance and skill.
Performance and Quality
Quality and performance are crucial in any DIY project, especially in watchmaking.

Timekeeping Accuracy
When it comes to mechanical watch kits, precise timekeeping is a top priority. After assembling my watch, I tested its accuracy. Despite initial concerns about magnet exposure, I was pleasantly surprised. The watch ran at an impressive -2 seconds per day, a mark of precision you’d look for in professional timepieces.
Assessing the Materials and Build
Whether assembling a DIY kit or a high-end watch, materials matter. The provided Miyota movement in the kit, with its minimal striping decoration, suggests a focus on aesthetic simplicity and functionality. The 38mm stainless-steel case, however, while sleek, presented issues like a loose crystal and gritty screw threads on the caseback. The tools, barring the missing screwdriver, were adequate, though the quality of the strap and spring bars brought some disappointment. In summary, the kit’s materials and build, though not without imperfections, offer a genuine watchmaking experience to enthusiasts.
Final Thoughts
After completing the assembly of the mechanical watch kit, I’ve gathered a few final thoughts about the experience. It’s been a fascinating and at times challenging journey, taking me through the intricacies of watchmaking hands-on. Despite some hurdles, such as the loose crystal and missing screwdriver, the satisfaction of building a watch from scratch cannot be understated. There’s a unique value in this kind of personal engagement with a timepiece.
The Experience and Value Proposition
There’s something inherently rewarding about completing a task as delicate as assembling a watch. This mechanical watch kit offers that experience, providing a sense of accomplishment that buying a pre-made watch can rarely match. It also serves as an excellent learning opportunity for those curious about the inner workings of a timepiece. In terms of value, the cost of the kit is reasonable considering the educational experience it provides, as well as the end product – a running watch you’ve built yourself.
Considering a Traditional DIY Approach vs. the Kit
For enthusiasts considering diving into watchmaking, the debate between using a kit and sourcing individual parts for a traditional DIY project is worth contemplating. A mechanical watch kit, like the one I used, simplifies the process by ensuring all parts fit together and providing tools. However, it may lack the customization and depth of learning that comes from choosing every component yourself. The traditional DIY route also offers a wider range of options and possibly better quality components, albeit at a likely higher cost and with more potential for frustration. Ultimately, the decision depends on your goals and the level of challenge you’re seeking.


